create hardisk ubuntu

1.  # parted -l

2. mklabel msdos

3. mkpart primary ext4 0 2048MB

4.  mkfs.ext4 /dev/sdb1

5 mkdir data1

6. mount /dev/sdb1 /mnt/sdb1

buar restart gak perlu mount

mount -t auto /dev/sdb1 /mnt/sdb1

7, df -hT


Storage devices play a critical role in the working of any system. Different operating systems use various types of file structures to store data. So generally we use GPT or MBL file storage styles for that. With the help of these two we can create partitions in a storage device. Also , We can split large memory sized devices into smaller sub-segments called partitions. Partitioning enables us to split our storage drive into multiple parts. Where each part acts as a seperate single storage drive. Apart from that we can use these partitions to install multiple operating systems in the same machine. Here we will learn to create partition in linux.

In general, this tutorial I will guide you through all the detailed wise steps. Here I am using the ubuntu server to create partitions. Furthermore ,with the help of this tutorial you will be able to create partitions on many similar linux distributions.

Creating Disk partition

Now , I will explain you how to create disk partition in ubuntu using parted command utility.

STEP(1) Check the partition table

We need to check all the available partitions and hard disks. For that, we will use the following command to display all the available partitions and hard disks. It will also dosplay the storage volumes which are not in use. Here, ‘-l’ flag means to ‘list’ the vailable partitions and hard disks.

# parted -l
create hard disk partition in linux

As you can see there are 3 available hard disks in this system. /dev/sda is the hard disk in use. Two other Hard disk volumes which are not in use are /dev/sdb and /dev/sdc .So here I will create partition in the unused disk /dev/sdb.

STEP(2) Manipulate the Disk partitions

Open the disk by using the following command.

# parted /dev/sdb

Then enter the following command at the ‘parted’ prompt .

# mklabel msdos
create hard disk partition in linux

Next we will create a new primary partition of size 2GB and then print the partition table. For that, we will use the following command.

# mkpart primary ext4 0 2048MB

NOTE: Make sure that you specify the correct device for partition , otherwise it would randomly pick a storage device.

As the total size of the hard disk attached to the system is around 4 GB. Now , we can create another partition from the remaining hard disk available. Similarly enter the same command to create another partition out of it. enter the following:

# mkpart primary ext4 2048MB 4341MB 

NOTE: Here 512B and 2049M are the starting blocks of the first and the second partition.

Now enter the ‘quit’ command to get out of the parted prompt . The changes made to the disk will be saved automatically.

STEP(3) Creating File system types

To create the file system types we can use the mkfs utility. Enter the following command to do that.

# mkfs ext4 /dev/sdb1
# mkfs ext4 /dev/sdb2
STEP (4) Mounting the partitions

Finally to access those partitions and to make their complete use , We need to mount them.Enter the following set of commands to mount these partitions.

# mkdir -p mount /sdb1
# mkdir -p mount /sdb2
# mount -t auto /dev/sdb1 /mnt/sdb1
# mount -t auto /dev/sdb2 /mnt/sdb2

Now after successful mounting of both the partitions, we can check whether the newly created partitions are available there for use or not. For that , use the df command.

# df -hT

Here we can see /dev/sdb1 and /dev/sdb2 are succesfully created and all their details are displayed as shown above.

In this tutorial I had shown you how to create partition in linux easily. To make that much simpler I chose an unused hard disk volume, so that you can get a better understanding from scrap level.
install wordpress

apt update

apt install apache2

ufw enable

ufw allow apache

apt install openssh-server

ufw allow ssh


apt install php php-zip php-json php-mbstring php-mysql 


wget https://files.phpmyadmin.net/phpMyAdmin/5.2.0/phpMyAdmin-5.2.0-all-languages.zip 

unzip phpMyAdmin-5.2.0-all-languages.zip 

mv phpMyAdmin-5.2.0-all-languages /usr/share/phpmyadmin 


mkdir /usr/share/phpmyadmin/tmp 

chown -R www-data:www-data /usr/share/phpmyadmin 

chmod 777 /usr/share/phpmyadmin/tmp 


nano /etc/apache2/conf-available/phpmyadmin.conf 


isinya :

Alias /phpmyadmin /usr/share/phpmyadmin

Alias /phpMyAdmin /usr/share/phpmyadmin


<Directory /usr/share/phpmyadmin/>

   AddDefaultCharset UTF-8

   <IfModule mod_authz_core.c>

      <RequireAny>

      Require all granted

     </RequireAny>

   </IfModule>

</Directory>


<Directory /usr/share/phpmyadmin/setup/>

   <IfModule mod_authz_core.c>

     <RequireAny>

       Require all granted

     </RequireAny>

   </IfModule>

</Directory>

=====================


sudo a2enconf phpmyadmin 

sudo systemctl restart apache2 


http://your-server-ip-domain/phpmyadmin


password mysql ???

apt install mysql-server

sudo mysql -u root

mysql> flush privileges;

mysql> USE mysql

mysql> ALTER USER  'root'@'localhost' IDENTIFIED BY 'pengentausaja';


opsi "dangerous"

mysql> ALTER USER  'root'@'%' IDENTIFIED BY 'pengentausaja';


atau buat user lain :


mysql>CREATE USER 'azila'@'%' IDENTIFIED BY 'pengentausaja@@@@@';


mysql>grant all privileges on *.* to 'azila'@'%' with grant option;


install wordpress


cd /var/www/html

wget https://wordpress.org/latest.zip

unzip latest.zip

cd wordpress

mv * ../


copykan ke /html semuanya


browser :

ketik alamat web (instalasi wordpress)

alamatweb/phpmyadmin

buat database


selesai.


user dimas

password: dimasuinjakarta@

install phpmyadmin versi 2 -

phpMyadmin is the best web based client for accessing MySQL servers. It is freely available to download and install on your server. You can host this on any server running with Apache and PHP.

The phpMyAdmin is written on PHP. The current phpMyAdmin version is compatible with PHP 7.1 and newer and MySQL 5.5 or MariaDB 5.5 or newer.

This tutorial will help you to install and configure phpMyAdmin on Ubuntu 20.04 Linux system.

Step 1 – Install Apache and PHP

We are assuming you already have installed the MySQL server on Ubuntu system. So just install the other required packages to run and access phpMyAdmin.

ADVERTISEMENT

sudo apt install apache2 wget unzip 
sudo apt install php php-zip php-json php-mbstring php-mysql 

Once the installation finished, enable and start Apache web server.

sudo systemctl enable apache2 
sudo systemctl start apache2 

Step 2 – Install phpMyAdmin on Ubuntu 20.04

phpMyAdmin is also available under the default packages repository but mostly they have older version. In this tutorial, we will download latest phpMyAdmin and configure on our system.

ADVERTISEMENT

Your system is ready for the phpMyAdmin installation. Download the latest phpMyAdmin archive from the official download page, or use the below commands to download phpMyAdmin 5.1.1 on your system.

After downloading extract archive and move to the proper location.

wget https://files.phpmyadmin.net/phpMyAdmin/5.1.1/phpMyAdmin-5.1.1-all-languages.zip    (sepertinya gak support php versi 7) coba ini 
wget https://files.phpmyadmin.net/phpMyAdmin/5.2.0/phpMyAdmin-5.2.0-all-languages.zip 
unzip phpMyAdmin-5.1.1-all-languages.zip 
mv phpMyAdmin-5.1.1-all-languages /usr/share/phpmyadmin 

Next, create tmp directory and set the proper permissions.

ADVERTISEMENT

mkdir /usr/share/phpmyadmin/tmp 
chown -R www-data:www-data /usr/share/phpmyadmin 
chmod 777 /usr/share/phpmyadmin/tmp 

Step 3 – Configure phpMyAdmin

Now, you need to configure web server to serve phpMyAdmin on network. Create Apache configuration file for phpMyAdmin and edit in text editor:

sudo vi /etc/apache2/conf-available/phpmyadmin.conf 

add the below content to file.

Save your file. Press ESC key to switch to command more. Then type : (colon) and type w after the colon and hit Enter.

After making all the changes, make sure to start the Apache service to reload all settings.

sudo a2enconf phpmyadmin 
sudo systemctl restart apache2 

Step 4 – Adjusting FirewallD

The systems with enabled firewalls need to allow HTTP service from the firewall. Run the below commands to open a port for the webserver in the firewall.

sudo firewall-cmd --permanent --add-service=http 
sudo firewall-cmd --reload 

Step 5 – Access phpMyAdmin

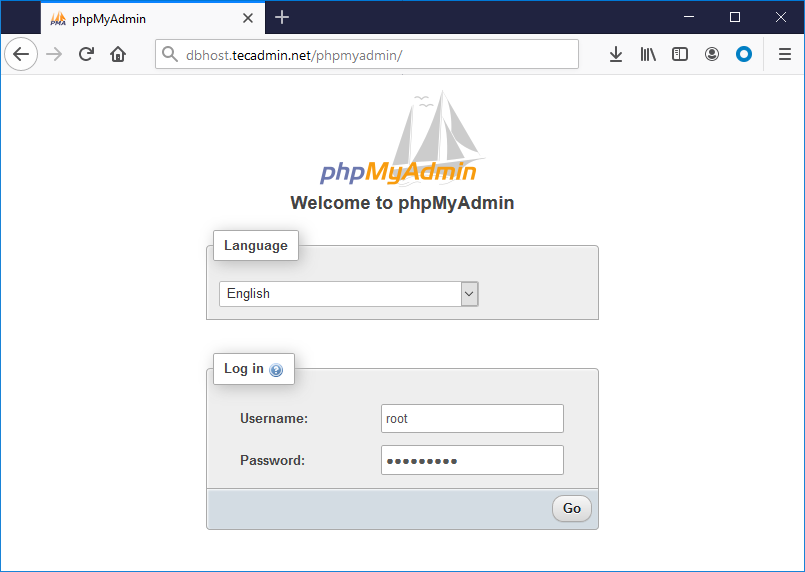
All done. You have finished the setup with the phpMyAdmin on Ubuntu Linux system. Now access phpMyAdmin with the server IP address or domain name.

http://your-server-ip-domain/phpmyadmin

Replace your-server-ip-domain with the localhost (for the local machines), or system IP address for remote machines. I have updated our DNS and pointed dbhost.tecadmin.net to the server’s IP address.

how to install phpmyadmin on ubuntu 20.04

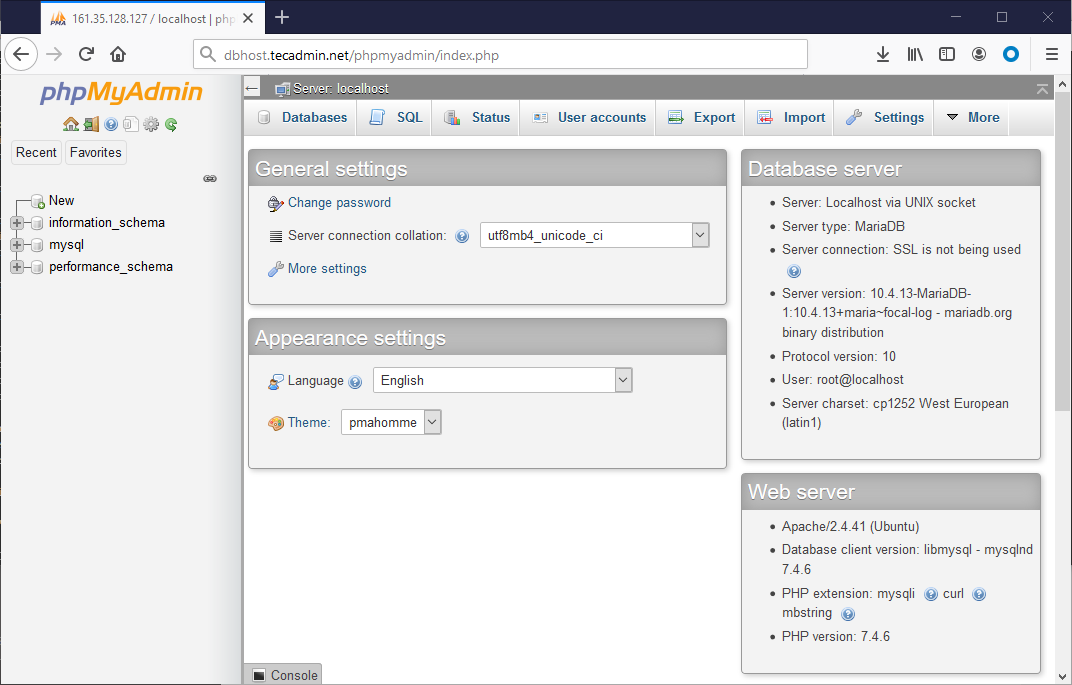
Log in with the username and password used to access MySQL on the command line.

setup phpmyadmin ubuntu 20.04

Conclusion

You have successfully configured phpMyAdmin on Ubuntu system. Let’s disable root user login for the phpMyAdmin for security purposes.


tambah user ke group root


Adding User to the sudo Group

On Ubuntu, the easiest way to grant sudo privileges to a user is by adding the user to the “sudo” group. Members of this group can execute any command as root via sudo and prompted to authenticate themselves with their password when using sudo.

We’re assuming that the user already exists. If you want to create a new user, check this guide.

To add the user to the group run the command below as root or another sudo user. Make sure you change “username” with the name of the user that you want to grant permissions to.

usermod -aG sudo username

Granting sudo access using this method is sufficient for most use cases.

To ensure that the user has sudo privileges, run the whoami command:

sudo whoami

You will be prompted to enter the password. If the user has sudo access, the command will print “root”:

root

If you get an error saying “user is not in the sudoers file”, it means that the user doesn’t have sudo privileges.